
This is a noip or dyndns alternative to point a domain to an dynamic IP address, one that changes over time like your home address for example.
All you need is a bash script and a domain on DigitalOcean.
Domain
If you don’t have a domain you can get one for a few dollars a year (a .online domain is just 1.49$ the first year on Namecheap.com).
Here in Spain we have DonDominio.com and their inexpensive 3€ .com.es domains.
We need to point the domain to DigitalOcean so we can use their API. By the way if you don’t know DigitalOcean I am a big fan, been using their servers for many many years and they are an amazing company. I don’t say that often.
If you create an account with this link you will get $100 in credit to spend the first few months.
Okay enough promo, on Namecheap or the registrar you have bought your domain from, change the DNS servers to:
ns1.digitalocean.com
ns2.digitalocean.com
Then back to DigitalOcean add the domain to your account, under Networking:
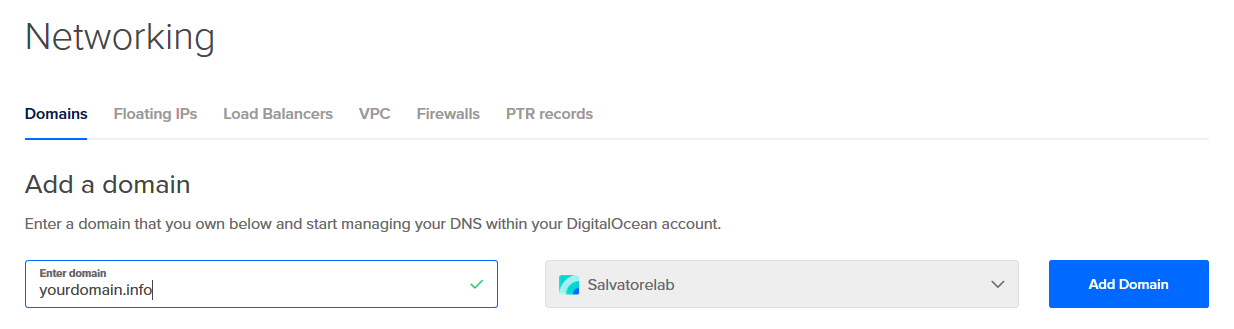
It usually takes an hour or two until the domain actually works.
Now we can add a subdomain, also known as an A Record, like home.yourdomain.info that will point to our home IP:
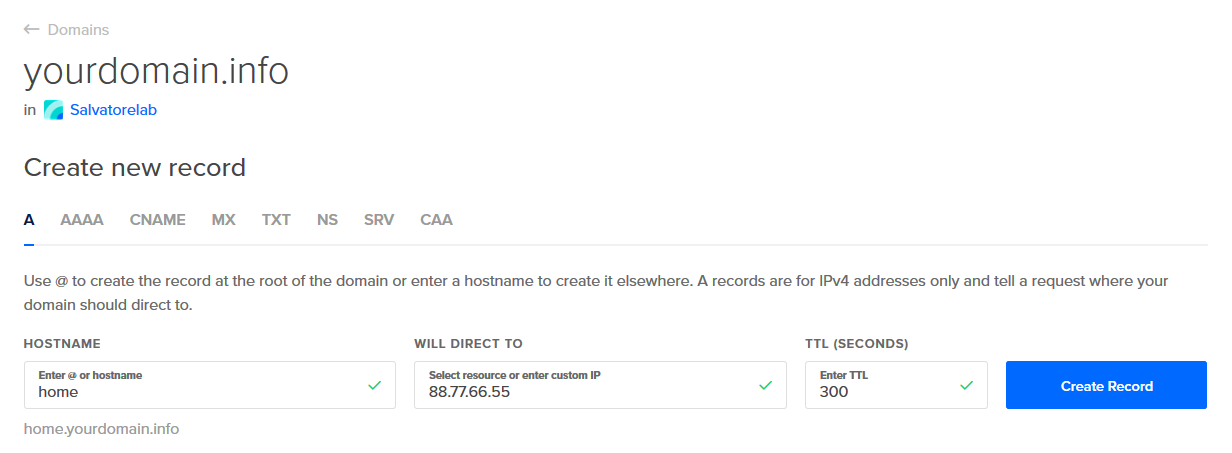
You can just write a random IP for now under the «Will Direct To» field. Don’t worry about that for now, the script will automatically update that for us.
Script
And now the script. In my case I will create the script on a Raspberry Pi that I have here at home. You can use your PC instead or a server or whatever you have that stays connected most of the time.
#!/bin/bash

#################### CHANGE THE FOLLOWING VARIABLES ####################
TOKEN="abcdef1234567890"
DOMAIN="yourdomain.info"
RECORD_ID="111222333"
LOG_FILE="/home/pi/ips.txt"
########################################################################

CURRENT_IPV4="$(dig +short myip.opendns.com @resolver1.opendns.com)"
LAST_IPV4="$(tail -1 $LOG_FILE | awk -F, '{print $2}')"

if [ "$CURRENT_IPV4" = "$LAST_IPV4" ]; then
    echo "IP has not changed ($CURRENT_IPV4)"
else
    echo "IP has changed: $CURRENT_IPV4"
    echo "$(date),$CURRENT_IPV4" >> "$LOG_FILE"
    curl -X PUT -H "Content-Type: application/json" -H "Authorization: Bearer $TOKEN" -d '{"data":"'"$CURRENT_IPV4"'"}' "https://api.digitalocean.com/v2/domains/$DOMAIN/records/$RECORD_ID"
fi
This retrieves your current public IP address and updates your home.yourdomain.info record accordingly.
I have also added a log file that will store all your IPs over time and will prevent the IP from being updated all the time if it doesn’t change.
To update the IP on DigitalOcean we use their API v2. You will need two things for the script to work, an API token and the record identifier.
The API token
The token is easy, go to the DigitalOcean dashboard, on the menu click API and generate a new token. That’s it. Save that token.
The record id
The record id is one command away, just replace the TOKEN and the domain below and run it:
curl GET -H "Content-Type: application/json" \
    -H "Authorization: Bearer TOKEN" \
    https://api.digitalocean.com/v2/domains/yourdomain.info/records | json_pp
You will get a list of all the records on your domain, probably the last one will be home.yourdomain.info and will have a numeric id, that is what we want.

Make sure that the name is «home» (or the subdomain you created on the dashboard). Also you can see that the data matches what you entered when you created the record. In my case it is 88.77.66.55, just a random IP, the script will update this for us.
We can now replace the record identifier variable in our script and run it. The first time you run the command it will create the log file if it doesn’t exist and then it will update the record. You can go to the dashboard and see if it worked!
Crontab
Now all we have to do is run this command every five minutes for example, just do crontab -e and enter something like this, depending on where you have placed the script:
*/5 * * * * /home/pi/dynamic_ip.sh
Now whenever your public IP changes the script will update the record to point to the new address.
Don’t forget to make the script executable with: chmod +x /home/pi/dynamic_ip.sh
Router
We are done, but if you want a domain pointing to your IP that is probably cause you have something at home you want to expose right? A website or a service listening on a port. Well, you need to open that port on your router and forward it to your computer or in my case the Raspberry Pi.
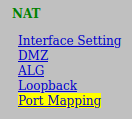
That’s easy. Go to 192.168.1.1 and enter your router config panel. It should probably be under Nat or local network and it should be called Port Mapping or Port Forwarding. We need to add one port forwarding, it looks like this on my router:
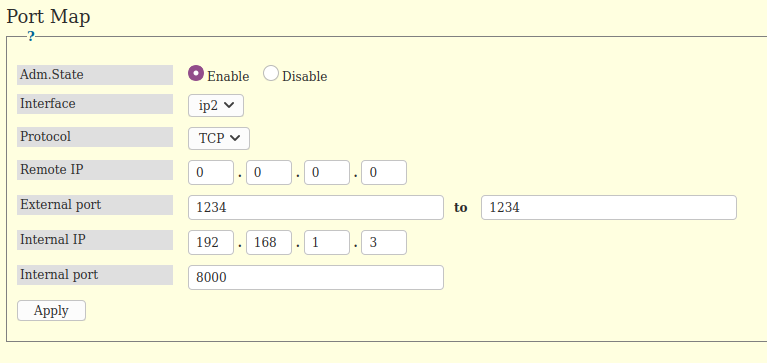
In this example I have redirected port 1234 to my Raspberry Pi (192.168.1.3) on port 8000. So when you open home.yourdomain.info:1234 you end up hitting the Raspi on port 8000.
Feel free to leave a comment below if this was helpful or ask any question you may have, I read all the comments 🙂
Thanks! I’ve added your suggestion to the article
How do you format this to use it for multiple domains+subdomains? Can I just add additional variables and repeat the final action with those variables?
curl -X PUT -H «Content-Type: application/json» -H «Authorization: Bearer $TOKEN» -d ‘{«data»:»‘»$CURRENT_IPV4″‘»}’ «https://api.digitalocean.com/v2/domains/$DOMAIN/records/$RECORD_ID»
Exactly, just repeat the curl line for every domain or subdomain that you want to point to your IP.
Check this if you have a moment it seems to work so far.
https://gist.github.com/Cordtus/2a511d1e5c66c5169f4b989abd91b94e
The only thing that didn’t work was auto-updating the record for my subdomains but since i have them all resolving to the same IP anyway I just deleted them all and have *.root.domain as the only record. My webserver handles the rest anyway.