SensorHub is a server for IoT data aggregation and visualization. I wrote about it a month ago here: SensorHub.
Back then it only had support for temperature and humidity sensors. The backend was flexible enough to enable support for other sensor types but it wasn’t ready yet.
Now that’s different, I have made a few changes and added a new sensor type: atmospheric pressure.
But more importantly: adding new sensor types is now much easier and obvious.
But before that, let’s talk a bit about this sensor.
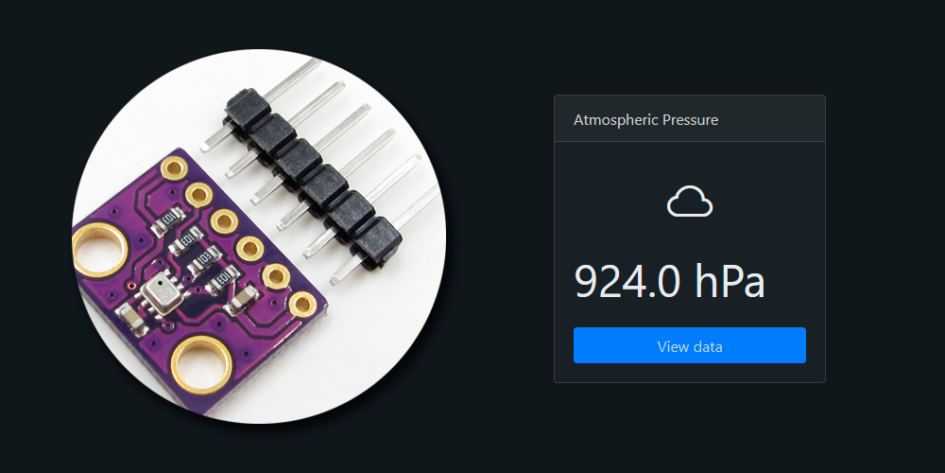
Barometric Pressure Sensor (BMP280)
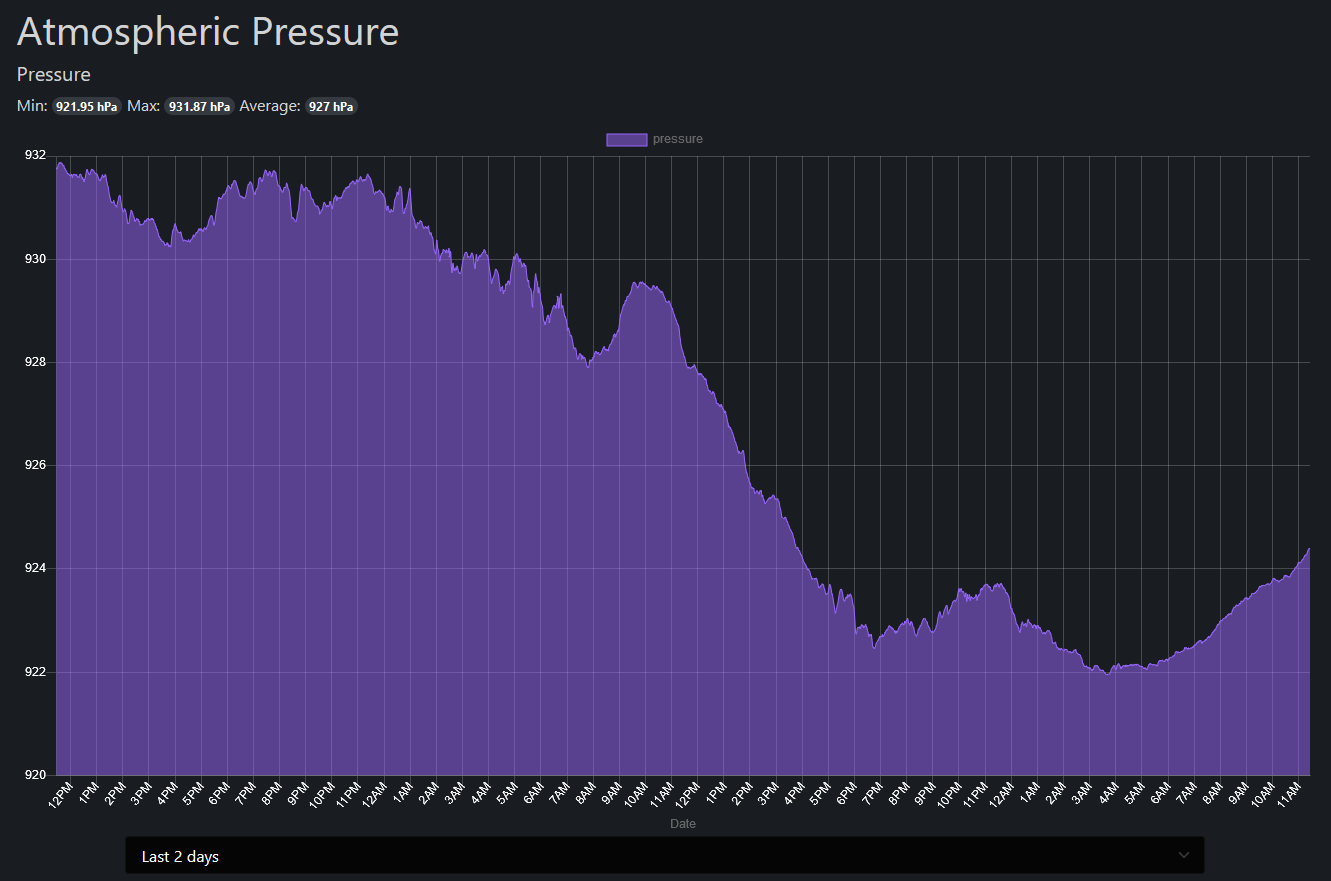
Atmospheric pressure is probably one of the most useful measures to predict weather. Fortunately these sensors are quite cheap.
I have used a BMP280 that can be found for around 1$ with shipping almost anywhere and it is very easy to use. Like most sensors it uses I2C protocol so it is very easy to connect to an existing bus shared with other sensors.
Here I have created an example Arduino code for NodeMCU and BMP280. If you don’t have a NodeMCU just remove the WiFi parts and it will work on your regular Arduino.
Wiring scheme for BMP280
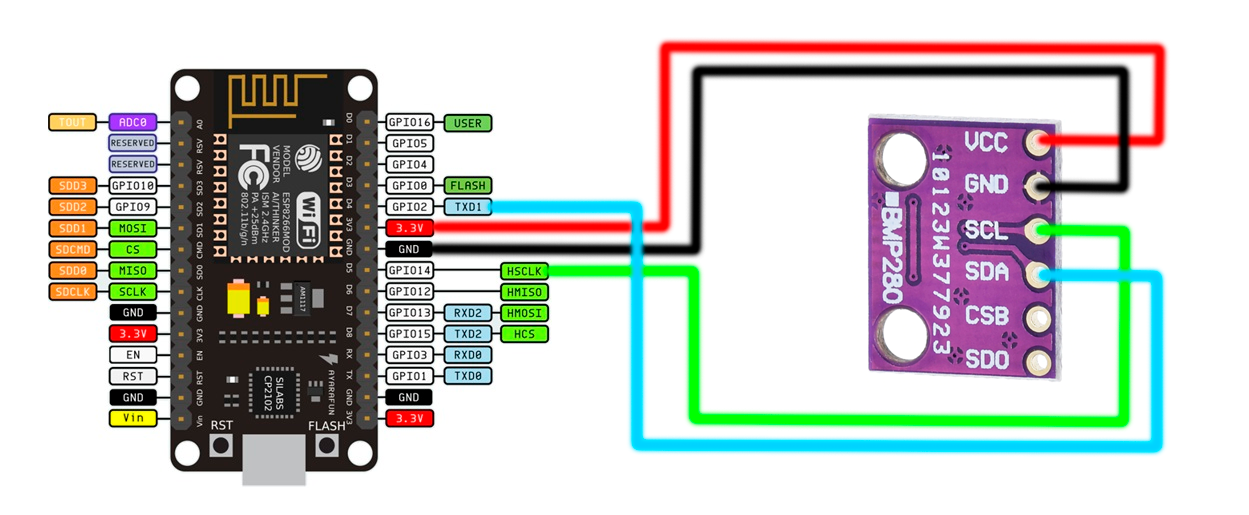
You can use D4 and D5 pins or any other digital pin as long as you setup your Wire library accordingly:
Wire.begin(D4, D5);How to add a new sensor type to SensorHub
A sensor type in SensorHub consists of two things:
- Data format definition
- Listing and detail templates (visualizations)
The data format (and the name of the sensor type) is defined in the Sensor model file:
TEMPERATURE = 'temperature'
PRESSURE = 'pressure'

SENSOR_TYPES = [
  (TEMPERATURE, 'Temperature and Humidity'),
  (PRESSURE, 'Atmospheric pressure')
]

SENSOR_FORMATS = dict([
  (TEMPERATURE, 'temperature,humidity,date'),
  (PRESSURE, 'pressure,date')
])
The format is used to store data in CSV files in a structured way. But you won’t have to worry about that. Just make sure that when the sensor sends data, in JSON format, the name of the fields («pressure» in this case) matches this format.
Dates are optional, if the sensor doesn’t send a date the server will add it automatically.
And for visualization you will have to add a card or listing view and a detail view.
Feel free to copy one of the existing templates and modify it to your needs.
Naming is important, so if the new sensor type is named «test», the folder for your template should also be named «test».
Add your card template to the listing template:
{% for sensor in sensors %}

	{% if sensor.type == "temperature" %}
		{% include "sensors/temperature/card.html" %}
	{% endif %}
	{% if sensor.type == "pressure" %}
		{% include "sensors/pressure/card.html" %}
	{% endif %}

{% endfor %}
You won’t have to modify anything for the detail template to work. If you have been consistent with naming that should work automatically.